2X4 Storage Bench Plans
This is a buildable 2x4 plan with exact cut sizes, screw pattern, and step-by-step SVG drawings. Follow the sequence and verify dimensions at each checkpoint.
Project Specs
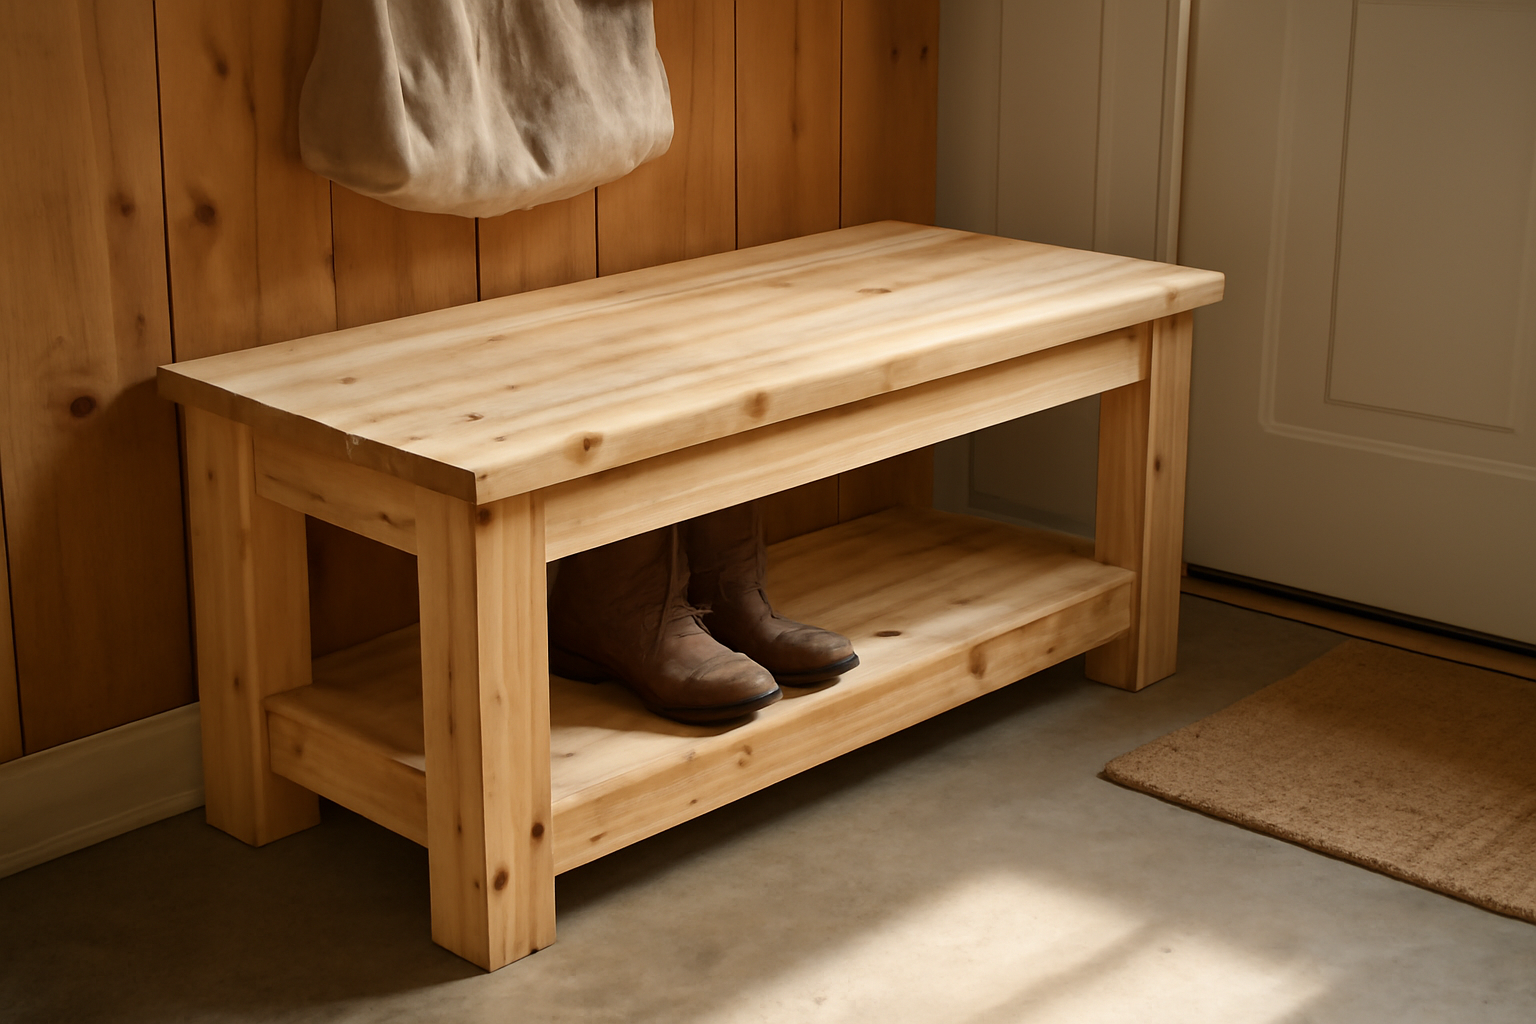
- Finished size: 48 inch L x 14.75 inch D x 18 inch H
- Estimated time: 4-6 hours (not counting finish cure)
- Approximate material usage: 8 studs of 2x4 x 8ft (includes waste)
- Nominal 2x4 actual size used in calculations: 1.5 inch x 3.5 inch
- Recommended finish: Polyurethane or oil finish
- Fasteners: 2.5 inch exterior screws + wood glue (use 3 inch screws for backrest posts)
Tools and Materials
- Miter saw or circular saw with guide
- Drill/driver, countersink bit, tape measure, speed square, clamps
- Sandpaper: 80 / 120 / 180 grit
- 2x4 lumber, wood glue, exterior or interior finish
Before You Cut Lumber
Sort lumber before cutting: pick the straightest pieces for long rails and seat slats, and reserve minor crown for shorter braces where clamps can correct alignment.
Dry-fit one side frame before driving screws into all joints. That 2-minute check catches most square and mirror-orientation mistakes before they lock into the assembly.
Cut List (All Parts from 2x4)
| Part | Qty | Length | Notes |
|---|---|---|---|
| Legs | 4 | 16.5" | Front/rear supports |
| Short top rails | 2 | 10.5" | Between legs, side frames |
| Short bottom rails | 2 | 10.5" | 4 inches above floor |
| Long top rails | 2 | 45" | Front and rear, seat frame |
| Long bottom rails | 2 | 45" | Front and rear lower frame |
| Seat slats | 4 | 48" | Top seating surface |
| Center support | 1 | 45" | Middle support under seat |
| Shelf slats | 3 | 45" | Open storage shelf |
Step-by-Step Assembly
Step 1: Cut and label all parts
Cut all 2x4 parts from the cut list. Mark each piece with painter tape (L1-L4 for legs, ST1-ST2 for short top rails, etc.) so nothing gets mixed during assembly.
- Target finished size: 48 inch length, 14.75 inch seat depth, 18 inch seat height.
- Use a stop block on the miter saw for repeated cuts (10.5 inch and 45 inch).
Step 2: Build two side frames
For each side frame, place two legs parallel. Install one 10.5 inch top rail flush with the top edge and one 10.5 inch bottom rail 4 inches from the floor. Use wood glue + two 2.5 inch screws at every rail end.
- Each side frame must have identical outside depth: 13.5 inches.
- Pre-drill to prevent splitting near rail ends.
Step 3: Connect side frames with long rails
Stand both side frames upright and connect them with 45 inch long rails: front top, rear top, front bottom, rear bottom. Check diagonal measurements before tightening final screws.
- Outside length must be exactly 48 inches.
- Difference between diagonals should be no more than 1/8 inch.
Step 4: Install center support and seat slats
Install one 45 inch center support parallel to the long top rails, centered between front and rear rails. Then install four 48 inch seat slats with 1/4 inch spacing. Use two 2.5 inch screws at each contact point.
- Keep slat overhang equal on both sides.
- Use a 1/4 inch spacer block for identical gaps (final seat depth about 14.75 inches).
Step 5: Add lower storage shelf
Install three 45 inch slats on the lower rails with even spacing. This creates an open shelf for shoes, tool bags, or bins while keeping airflow under the seat.
- Use 2 inch screws and pre-drill each end.
- Leave small gaps so dirt can fall through and cleaning stays easy.
Step 6: Sand, finish, and load-test
Sand all edges with 80 -> 120 -> 180 grit. Apply finish. For outdoor benches use exterior sealer on all sides, including underside. After curing, perform a staged load test (100 lb, then 200 lb).
- Retighten all screws after first 24 hours of use.
- For outdoor use, renew sealer every 12 months.
Quality Checks Before Use
- Bench sits flat on level floor without rocking.
- All screw heads are flush or slightly recessed.
- No sharp edges remain on seat/front corners.
- Glue squeeze-out removed before finish.
Finishing and Maintenance
Break sharp edges, vacuum dust from end grain, and apply finish to all faces (including the underside) for uniform moisture movement and longer service life.
Common Mistakes and Fixes
- Building both side frames without confirming they are mirrored. — Lay both sides on the floor before final screws and flip one frame to mirror orientation.
- Skipping pilot holes near board ends. — Pre-drill and countersink to reduce splitting, especially on dry or knotty stock.
- Forgetting to check diagonal measurements during assembly. — Measure corner-to-corner and adjust clamps until both diagonals match.
- Applying finish only to visible surfaces. — Seal all sides, including underside and end grain, to limit warping outdoors.
Related Plans
This Guide Also Covers
- 2x4 storage bench plans free
- diy 2x4 storage bench
- build 2x4 storage bench
- 2x4 entryway storage bench plans
- 2x4 outdoor storage bench
- 2x4 bench with storage and lid
- 2x4 toy storage bench plans
- 2x4 mudroom bench with storage
FAQ
Q: How much weight can this bench hold?
With dry lumber, glue, and correct screw pattern, this frame is designed for about 250 to 300 lb distributed load.
Q: Can I build it without pocket holes?
Yes. The plan uses butt joints with pre-drilled structural screws, so a pocket-hole jig is optional, not required.
Q: Can I make it longer than 48 inches?
Yes. Increase long rails and slats equally, and add one extra center support for every additional 24 inches of length.
Q: Is pressure-treated lumber required?
Only for outdoor use. For indoor benches, kiln-dried SPF 2x4 is easier to cut and stays straighter.
Q: Will the lower shelf hold shoes or bins?
Yes. The shelf slats sit on the lower rails and can handle everyday storage if screws are installed at every rail crossing.
Q: What hardware is recommended for a storage-bench lid?
Use a piano hinge or heavy-duty hinges sized for the lid width, plus lid-support hardware so the top stays open safely. Pre-drill hinge screws and verify clearances before final tightening.
Reference: source 1
Q: How much clearance should I leave for shoes under an entryway bench?
A common target is around 6 to 8 inches of clear shelf height for everyday shoes; boots may require more. Measure your household footwear first and set lower rails accordingly.
Reference: source 1 | source 2
Q: How deep should a 2x4 bench seat be?
A practical target is 14 to 15 inches for a simple backless bench made from 2x4 stock. Going deeper can improve comfort, but it also increases material use and may need extra bracing to prevent flex.
Reference: source 1 | source 2
Q: What is the ideal bench seat height for adults?
For most adults, 17 to 19 inches is the comfort range, and 18 inches is a reliable default for DIY benches. If users will wear heavy winter clothing or use thick seat cushions, build closer to 18.5 to 19 inches.

Reader Comments (4)
Nice plan. I dry-fit the frame first, then glued and screwed in sequence. That avoided chasing alignment on the last rail.
👍 11Replying to JimBuildsThings: Spec note: matching rail lengths and centered support were the key quality gates. Once those passed, the rest was straightforward.
👍 9Outdoor builders: don't skip finish on end grain. A full surface seal gave me a much cleaner result through rain cycles.
👍 14Everything lined up once I treated each side frame as a mirrored pair before joining with long rails. Also, light coats of wipe-on polyurethane held up well after cure.
👍 5Share Your Build